June 2015
Like other major endeavors with the 5th wheel, we tried to do our research. Wanting to be able to function “off-the-grid” for periods of time, preferring to stay at National Parks, National Forest land, or Bureau of Land Management land, we needed an alternative to sewer hook-ups and dumping the “black tank” (a nasty & potentially messy job, at best).
Composting Toilet – What it is and Why You Need One
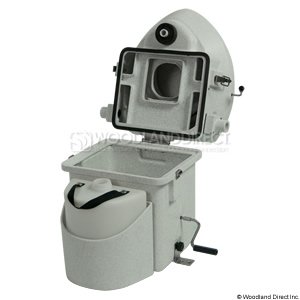
The toilet is self-contained, urine diverting and a totally waterless operation. Due to our human anatomy our urine goes to the front section of the toilet when we are seated on the toilet. This drains directly into a 2 gallon container that can be emptied almost anywhere – urine by itself is safe. It can be dumped into a public toilet, vault toilet, or even in the woods (boys do that all the time, right?) The “solids” go into a separate container that is half-filled with Coire or Sphagnum Peat Moss (you only open that if you need it). After each “deposit” this container is stirred up with an integrated agitator – note the hand crank on the side. The solids mix with the organic matter and, given time, become compost. The unit has a small 12 volt computer fan running all the time in the composting bin to dry the contents and vent any odors that may linger.
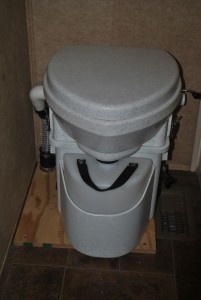
We first installed this in my son’s bedroom and used it for a couple months (he had already moved out!). I attached it to a plywood board, cut a hole into a masonite board, mounted the board in the window, and ran the exhaust hose through it, connected the fan to a 12 volt transformer — and we were in business. We used it for about two months and everything worked just as expected.
For our first trials I bought a block of Coire — which is compressed coconut husks and is completely recycled. (Bought online from Walmart for about $20.) This was enough for 4 or 5 changes of the compost bin. We now buy Sphagnum Peat Moss since it is readily available at most garden stores. We can go 14 to 21 days of use between changes using either medium.
Installing in the trailer was slightly more challenging.
First, we ran as much water into the existing Black Tank as we could & added a tub of Happy Camper tank cleaner. Then we removed the ceramic flush toilet & inserted a plug into the floor drain. (If we ever changed our mind or sold the trailer, we could pull this plug and drop a standard RV toilet right back in place.)
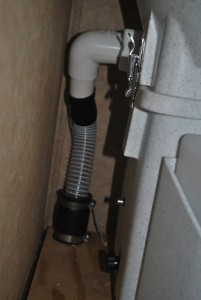
Since the bathroom in the 5th wheel has no windows, next came the hard part — venting the unit. I cut out a small section of the vent pipe that goes up through the roof from the black tank so I could insert a T-connector. However, the toilet vent is for 1 1/4″ plastic pipe — and the black tank vent was 1 1/2″ plastic. Not a horrible task … if I had realized it before my first trip to the hardware store. But working in the utility space off from the basement and under the bathroom floor and going in and out, then back to the store for adapters, made this the most challenging part of the job.
I drilled a small hole in the floor & ran the 12 volt line from the toilet to the 12 volt fuse panel, added a small fuse for the toilet, and that part was done!
Finally, since we had left in place the ring & mount from the original toilet, we cut a hole in the mounting board (the one we had used in the house) to accommodate the ring, and screwed the board to the floor with the brackets attached to this mounting board. Project Finished!!! — I have since trimmed the plywood to the exact footprint of the toilet base, so that it no longer is visible.
We have used the Composting Toilet for over 6 years of living in the 5th wheel full-time and it works great! Both Judith & I are very satisfied with it!
For other aspects of making your decisions about RV Living, here are other posts on the subject: RV Life & Technical Details
rev. Feb 2021


After having the composting toilet for a while, how do you like it now?
We continue to be very happy with it! And, we never have to worry about a Black Tank!
Email directly to mhouser@yourpcgeek.com if you want to discuss further.